
Whether you’re a seasoned unicyclist or just starting out, you know that having good bearings is key to a smooth and enjoyable ride.
Keeping your bearings in top shape is essential for safety and performance, but even the best bearings won’t last forever.
Knowing how to replace your unicycle bearings is an important skill for any unicyclist and one that could save you time and money in the long run.
In this blog post, we’ll explore the steps you need to take to replace your unicycle’s bearings, from gathering the right tools to successfully completing the job. Get ready to get your hands dirty and learn how to replace unicycle bearings like a pro!
What is a unicycle bearing
What is a unicycle bearing?
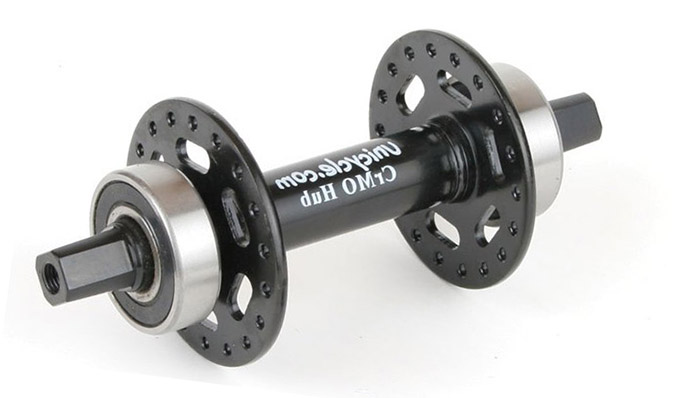
Unicycle bearings are small metal or ceramic components that are designed to reduce friction and enable smooth rotation of the wheel hub of a unicycle. They are typically made of steel, ceramic or other high-quality materials that are durable and long-lasting.
Unicycle bearings consist of an inner and outer race, which contain a series of small steel balls or ceramic balls. These balls rotate between the two races, allowing the wheel hub to spin freely.
Over time, these bearings can wear out due to constant use and exposure to dirt, dust, and other debris. When this happens, the wheel hub may start to wobble or make unusual noises, which can affect the performance and safety of the unicycle.
Replacing worn or damaged unicycle bearings is an important part of maintaining your unicycle’s performance and safety.
Related:
1. Tools and Materials Needed to Replace Unicycle Bearings
Before you get started, you’ll need to gather some tools and materials. Here’s what you’ll need:
- Bearing puller: This tool is essential for removing the old bearings from the wheel hub. You can find bearing pullers at most bike shops or online retailers.
- Wrench: You’ll need a wrench to loosen and tighten the bolts and nuts on your unicycle. Make sure you have the right size wrench for your unicycle.
- Hammer: Sometimes, bearings can be stubborn and difficult to remove. A hammer can be helpful in tapping them out of the wheel hub.
- New bearings: Make sure you purchase the right size and type of bearings for your unicycle. You can find the specifications in your unicycle’s owner’s manual or by contacting the manufacturer.
- Lubricant: A small bottle of lubricant can help keep your new bearings moving smoothly. Look for a lubricant that’s specifically designed for bike or unicycle use.
- Cleaner: You’ll need a cleaner to remove any dirt or debris from the wheel hub before installing the new bearings. A mild soap and water solution or a bike-specific cleaner will work.
2. Preparation to Replace Unicycle Bearings
Before you start working on your unicycle, it’s essential to take some safety precautions. Here’s what you should do:
- Find a stable work area: Look for a flat surface where you can work comfortably on your unicycle. Make sure you have enough space to move around.
- Wear gloves and eye protection: Bearings can be sharp and metal parts can be greasy. Protect your hands and eyes with gloves and safety goggles.
- Disconnect any electrical connections: If you have an electric unicycle, make sure you disconnect the battery before you start working on it.
Once you’ve taken these precautions, you can begin the process of replacing your unicycle bearings.

Removing the Wheel and Old Bearings
3. Removing the Wheel
The first step is to remove the wheel from your unicycle. Here’s what you need to do:
- Loosen the bolts or nuts: Look for the bolts or nuts that hold the wheel in place. Use a wrench to loosen them enough so that you can remove the wheel from the unicycle.
- Remove the pedals: Look for the pedals on your unicycle. Use a wrench to unscrew them and remove them from the cranks.
- Remove the cranks: The cranks are the metal arms that attach to the wheel hub. Use a crank puller to remove the cranks from the wheel hub. You may need to use some force to get them off.
4. Removing the Old Bearings
Now that you’ve disassembled your unicycle, you can remove the old bearings. Here’s how:
- Remove the dust caps: The dust caps cover the bearings and protect them from dust and dirt. Use a flathead screwdriver or a knife to gently pry them off.
- Remove the old bearings: Use a bearing puller to remove the old bearings from the wheel hub. You may need to use a hammer to tap them out if they are stubborn. Be careful not to damage the wheel hub or the new bearings.
5. Cleaning the Wheel Hub
After you’ve removed the old bearings, you’ll need to clean the wheel hub before installing the new bearings. Here’s what you need to do:
- Remove any dirt or debris: Use a cleaner to remove any dirt or debris from the wheel hub. Make sure you get all the nooks and crannies, as well as any leftover grease or grime from the old bearings.
- Dry the wheel hub: Once you’ve cleaned the wheel hub, use a clean rag to dry it thoroughly. Make sure there’s no leftover moisture or cleaner on the wheel hub.
6. Installing the New Bearings
Now it’s time to install the new bearings. Here’s how:
- Apply lubricant: Apply a small amount of lubricant to the inside of the wheel hub. This will help the new bearings slide into place smoothly.
- Insert the new bearings: Insert the new bearings into the wheel hub, making sure they are seated securely. You can use a bearing press or a socket to press the bearings into place. Be careful not to damage the bearings or the wheel hub.
- Replace the dust caps: Once the new bearings are in place, replace the dust caps over the bearings. Use a hammer or a mallet to tap them into place.
7. Reassembling the Unicycle
Now that you’ve installed the new bearings, it’s time to put your unicycle back together. Here’s what you need to do:
- Replace the cranks: Use a crank puller to attach the cranks back onto the wheel hub. Make sure they are tightened securely.
- Replace the pedals: Screw the pedals back onto the cranks. Make sure they are tightened securely.
- Replace the wheel: Slide the wheel back onto the unicycle and tighten the bolts or nuts with a wrench. Make sure the wheel is aligned properly and spins smoothly.
8. Testing the Unicycle
Once you’ve reassembled your unicycle, it’s important to test it before you ride it. Here’s what you need to do:
- Spin the wheel: Give the wheel a spin to make sure it spins smoothly and doesn’t wobble or make any strange noises.
- Check the brakes: If your unicycle has brakes, make sure they are functioning properly.
- Test ride: Take your unicycle for a short test ride to make sure it’s operating correctly. Make any necessary adjustments if something feels off.
Conclusion
To replace unicycle bearings, you need to first remove the wheel from the unicycle, remove the old bearings using a bearing puller or punch, clean the wheel hub, install the new bearings, and reassemble the unicycle.
While the process may seem intimidating at first, it’s relatively straightforward with the right tools and a little patience.
It’s an essential part of maintaining your unicycle’s performance and safety, you can ensure that your unicycle operates smoothly and safely, providing you with a fun and enjoyable riding experience.
As unicyclists, we rely on our equipment to perform at its best, allowing us to push our limits and explore new frontiers. By taking care of our unicycles and maintaining them properly, we can continue to do what we love for years to come.


 is Better than Other Types of Transport?")


